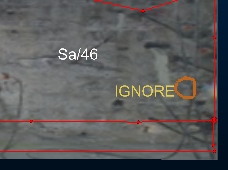
Map Comments

You can annotate a map in Studio Mapper, using either a map or 3D world view.
Note: You can digitize this map data type using either the 3D map or butterfly map view. Butterfly maps are only available if your configuration permits it.
The Comments panel of the Mapping task bar is used to digitize point on the active face, then type a comment. Formatting is defined in advance apart from colour, which can be set at the point of defining text.
Existing comments appear in the Comments table, and can be independently formatted using table features. All comments for all faces of the current map are listed in the table. You can enable or disable the view of a comment using the check box on the left of the table, or you can permanently delete a comment using the 'X' button on the far right.
Comments can also be repositioned interactively.
Comments are georeferenced along with all other map data and any edits made to comments on a georeferenced map will be instantly reflected in the associated map window.
Add a Comment to a Map Face
- Select the map and face to be annotated.
- Enable the Comments panel
- Define the Type of comment you wish to add: a 2D comment will remain the same size regardless of the screen magnification whilst a 3D comment will scale dynamically with the data in the map or world window.
- Select the Font and Size for comments on the current map. All comments on a face will inherit the same size and font attributes.
- Select Add Comment.

- Digitize a point on the map at which you want the comment to appear.
- Use the New Comment dialog to enter text. Only ANSI characters are supported.
- Choose a Colour for your comment - each comment can have its own colour.
- Click OK to add the comment to the map.
- If required, use the move comment button to dynamically reposition
a comment:

Tip: Edit existing comments by changing the appropriate Comment field in the displayed table.
Related topics and activities
